Pages

Showing posts with label T-Shirt Quilts. Show all posts

Thursday, December 25, 2014

T-shirt Quilt Class: Part 2

Note: I've had this post written for almost a month.  I've just been waiting for Christmas so these can all be gifted!

As part of my t-shirt quilt class I offer my longarming services at a discount for taking my class.  All of my students took me up on this offer.  So during our first Saturday class I spent quite a bit of time figuring measurements and telling the ladies how many yards of backing fabric and batting to buy.  My normal quilt intake is that I quilt in the order that I receive the quilts.  When I received all the quilts on the same day I stuck with that same way of doing things.
Scroll through to see all the different t-shirt quilts that were made and how they look after they were quilted. Enjoy!
Close up of the quilting.

Finished quilting.


Close up of the quilting.  I actually really liked the quote on this tshirt.


Finished Manhattan High quilt.

I loved the colors on this quilt.  It was bright and beautiful.  I'm still looking for some of the purple border fabric for myself.  She said she bought the last of it at JoAnn's and she wasn't kidding!--This picture doesn't want to move to hang out with its like pictures so here it rests.

Finished Riley Co. HS quilt.  He was very involved in sports.


On this Riley Co. HS quilt I put different sporting balls in the sashing.  Here's a baseball I drew freehand.


The basketball I freehanded in the sashing.

Football.

This says Falcons. I wrote it with block lettering freehand with my quilting machine.  


The finished Pi Beta quilt.  

This quilt had some creative blocks to get all the tshirts included.  

A close up of the previous picture.  There are actually 3 shirts that make this block up and we appliqued the K-State Proud shirt to the shadow border to make it have the wavy look.

I'm really proud of this shirt.  My quilting machine didn't balk once and going through 3 layers of interfacing, 4 layers of  tshirt material and a layer of satin letter material all at once on the opening of the shirt.

This is the front side to a two-sided quilt.  There are over 30 shirts on the front and another 30+ on the back.  The vertical sashings are made with old jeans.  The make of this quilt made this tshirt for her daughter.  They adopted her when she was about 10 or 11.  One of her first requests was that her mom make her a tshirt quilt.  So this year is the 10th anniversary of her adoption so her mom who had been saving tshirts and jeans all these years made the daughter her tshirt quilt.  

Here's the backside of the humongous tshirt quilt.  I worried a little about the tshirts lining up and quilting through the denim but it was smooth as a whistle.  

Saturday, November 22, 2014

T-Shirt Quilt Class Part 1

This fall I was lucky to teach a t-shirt quilt class through a local community organization, UFM.  I was talking with the director about quilting classes that would do well and we some how got around to t-shirt quilts.  I've made several t-shirt quilts throughout the years and recently started making them for others.  When you're sewing for others efficiency becomes essential.  I decided I had enough practice making them that I could teach others how to make a t-shirt quilt class. Note: I only remembered to take photos at the last class so I sprinkled them throughout the post even though they don't technically line up with each topic in each paragraph.
Meg working on putting the sashing onto her t-shirts.
I set my class up into 3 sessions. The first session was only 1 hour on a Wednesday night.  This class was specifically to cover what the students would need to bring to class on the two Saturday sessions we would be holding and to demonstrate what we would be covering the first session.  I had handouts and materials all there so everyone could see exactly what was going to be needed.  The most expensive too that students were going to need for the class was a 16.5"x16.5" square ruler to cut out their t-shirts.  They cost $35 at our local fabric/crafting store in town.  Luckily, the day before class my brilliant husband decided he could make them a lot cheaper than that so he went to the Home Depot and purchased some thick clear acrylic and made one on his table saw here at home.  At class I offered for those who were interested he would make them one as well.  Everyone took me up on that offer.  His only cost $10.  They don't have the nifty measuring lines but for our class we didn't need them.
Barbie working on her t-shirt quilt.  This was Barbie's first time sewing.  She did an awesome job!
Our first Saturday class was an all day class where you worked until you were finished.  We cut off the arms and sides of our shirts, ironed on lightweight stabilizer and then cut out our shirts with our new nifty 16.5" square ruler.  Most ladies had between 9-16 shirts.  I had one very ambitious lady who had over 60 shirts!  (A little more on her quilt in my next post.)  Students brought their irons, ironing boards and cutting supplies and worked hard.  Most everyone was finished before 4PM.  No sewing required!
There was lots & lots of ironing throughout our classes.
This was a mother-daughter team, Bonnie and Shelly.  Their teamwork worked great. They brought only one set of
all the supplies and it worked out that while one was sewing the other was ironing or setting
up for their next row.
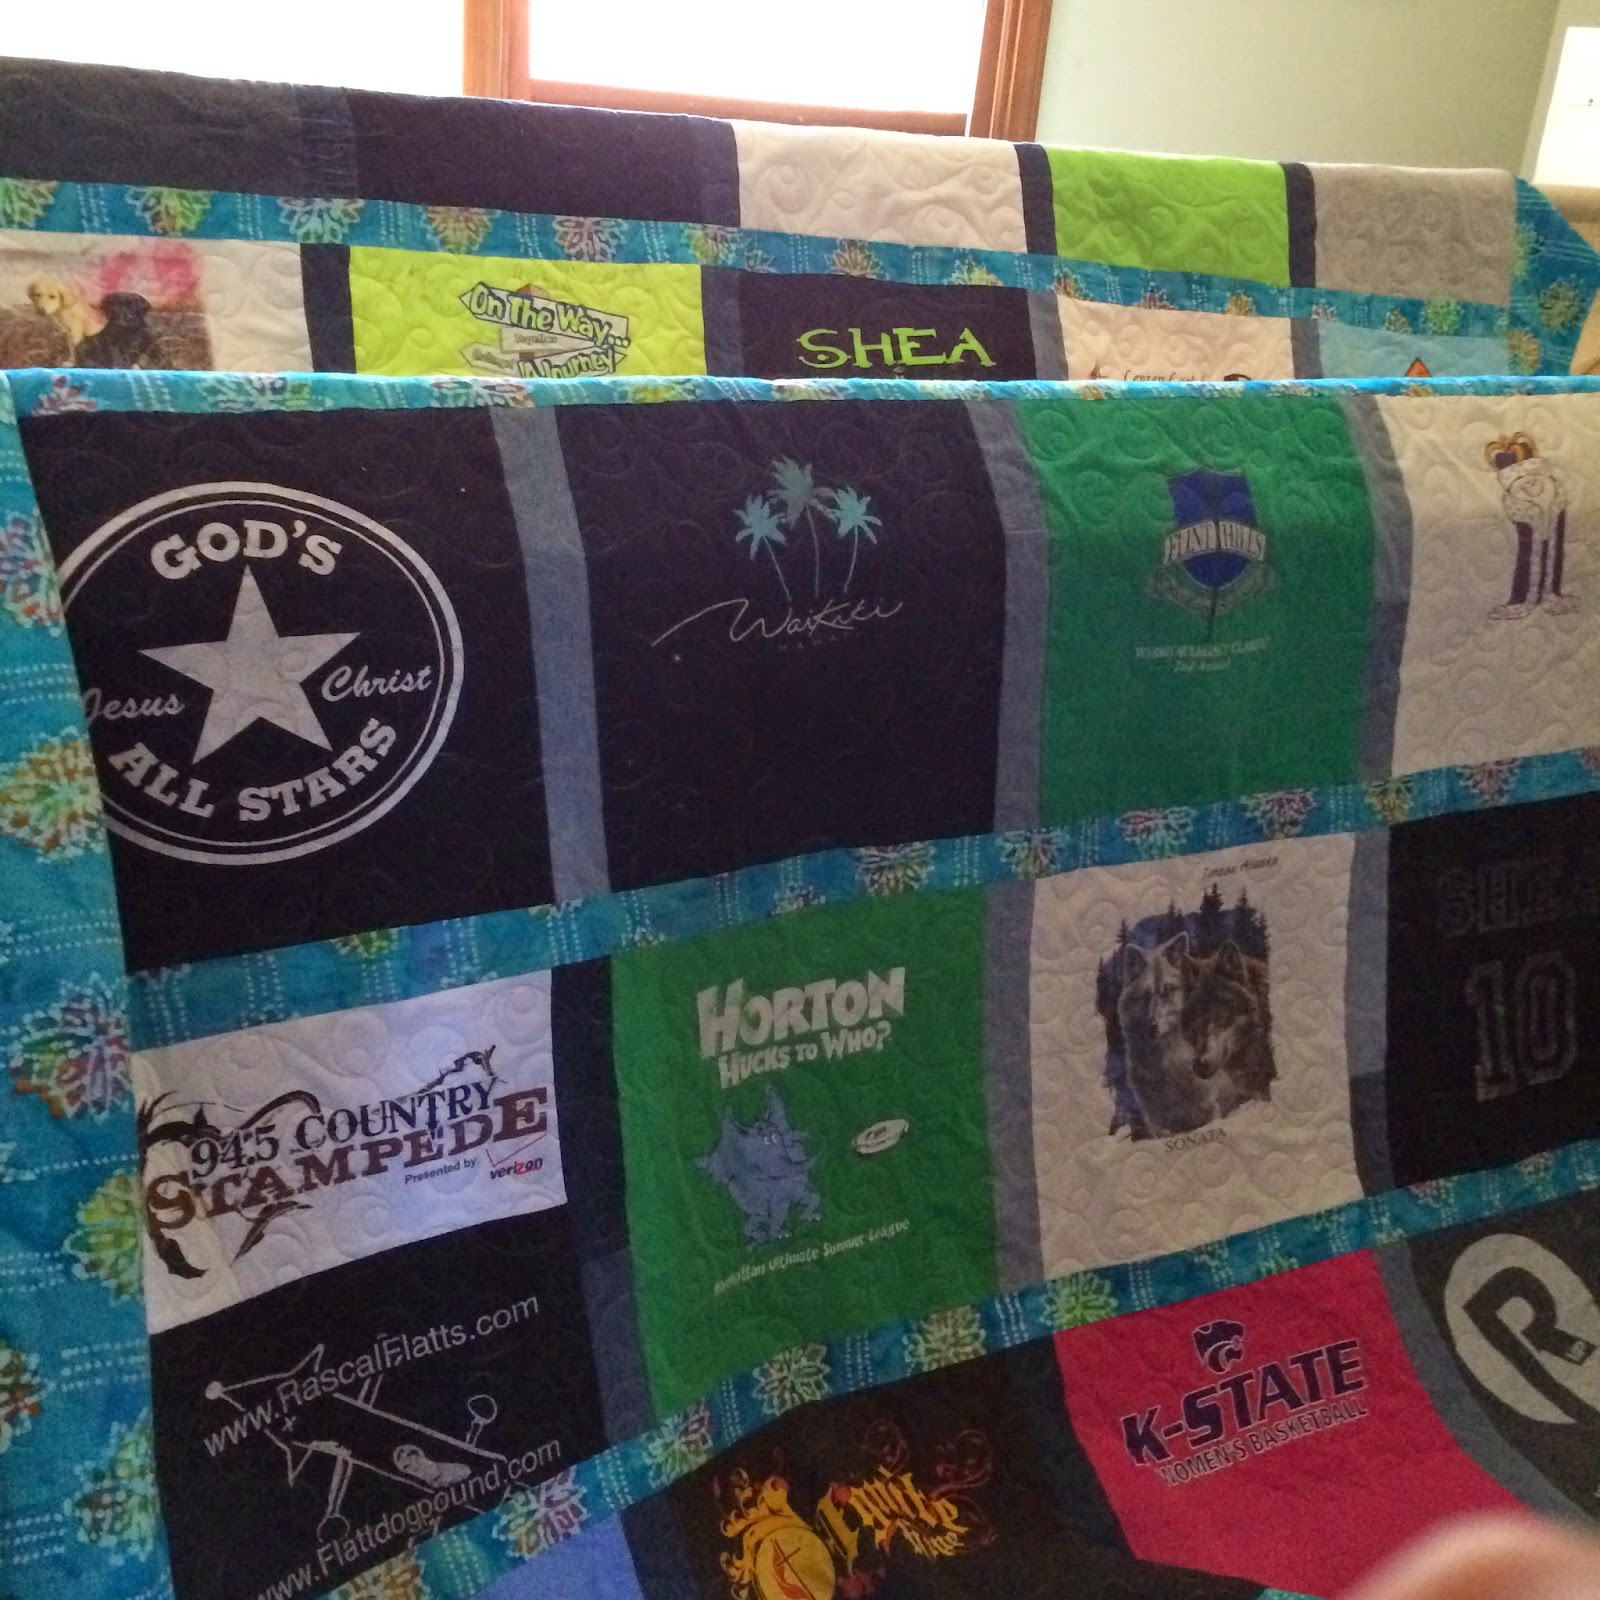
The following Saturday we met again to piece our t-shirt quilts together.  After answering the question multiple times, "Are you sure we are going to get these done today?"  I think I finally had them convinced that we would.  And we did!  With all of the prep work out of the way we started sewing on our sashing between the t-shirts and then joined them into rows of t-shirts.  We then connected the rows with sashing and added our borders.  These were some hard working and determined ladies in my class.  I helped by ironing and cutting as necessary.  My biggest job throughout all the classes was doing the math for fabric amounts and such.
Everyone finished the piecing of their quilts on the day.  My student, Diane who had the 60+ t-shirts finished the front side of her quilt, using 30 t-shirts on it.  I would say that's pretty darn good work!  Next time I'll show you how their quilts looked after I quilted them.

Our mother-daughter team, Shelly and Bonnie, showing the t-shirt quilt Bonnie pieced.

Our mother-daughter team, Shelly and Bonnie, showing the quilt that Shelly pieced.

Barbie's quilt pieced at the end of a long day. This is a gift for her son for Christmas.  We figured he wouldn't be
surfing quilting blogs and run into his quilt so he went ahead and put it in here.  :)

Sunday, July 6, 2014

T-Shirt Quilt

Part of my original business plan included making t-shirt quilts.  I put out a call for t-shirts and had several takers.  My second cousin in Arizona sent me her box right before the end of the school year hit the fan.  I had warned her that it would probably be a little while until I got to them-she may not have anticipated quite the entire month of June.
I started last Monday working on her t-shirts and finished up today.  She had cut some of the shirts already so I was unable to do my original design I had in place for t-shirt quilts.  What I ended up doing to accommodate all the different sizes of shirts was I cut all the shirts on 3 inch intervals.  I had 3"x3", 3"x6", 12"x12", 9"x12", etc t-shirts to work with to form a quilt.
The t-shirts on my improvised design wall.  
I laid all the cut t-shirts on my bed and went to work rearranging them until I had a pleasing square quilt.  I had a few gaps where there were not t-shirts that fit and no left over t-shirts to put in those places.  So in those spots I put squares and rectangle cuts of the border fabric.  I pieced them together having to use partial seams with several of the more unusual sized t-shirts.  Partial seams were not nearly as bad as I remember them being.  I then went to work on the border. Since I didn't need to put sashings into the quilt because of it's neat design I spent a little extra time making a very exciting border.  I assembled the pieces and added them onto the quilt.
Ready to go.
I loaded the quilt onto the longarm and got busy using a free motion design that I love.  My double bubble design is becoming my favorite design to quilt when I'm not using a pattern and just going free motion.  It's easy and relaxing.
Ready & waiting to get started on the longarm.
A close up of my double bubble design I like to free motion on the longarm.
I pulled the quilt off the longarm and added the binding.  I chose instead of hand sewing the binding down to machine sew it down this time.  It worked out well as I've never done that before and believe that will be my go-to binding strategy for t-shirt quilts.
The final product, it measures about 70 X 85 .